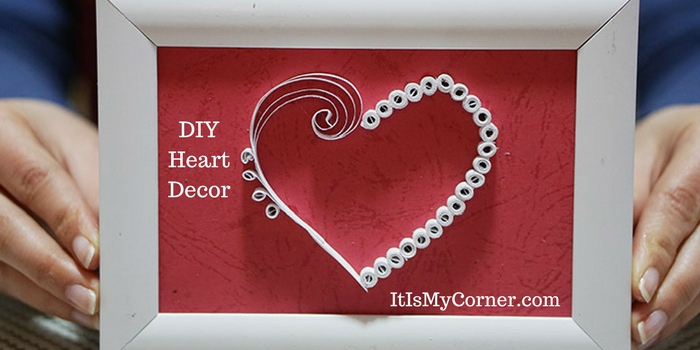
Making Special DIY Heart Decor
By Phoebe Nguyen | DIY

Perhaps you think about Valentine’s Day as the most special time of the year. If you have a boyfriend or girlfriend, I’m sure you want to share your feelings with them by making special DIY heart décor. There are a number of different types of heart décor that you can make, and in this article, I’m going to touch on a few of them.
As Valentine’s doesn’t have to be just once a year, know that you can make all of these items later on, too, and use your sense of handiness any time of the year to give your boyfriend or girlfriend gifts. As you will find out, there are a variety of different types of DIY products that are easy and fun to make, and they have that special personal touch that will really please your girlfriend or boyfriend. So, why not read on to find out more about what all you can learn how to make?

First, take your cardboard, measure the size of the frame and cut one piece of the cardboard with the same size. To skip the steps like measuring and drawing the dimensions of the frame you can take the cardboard that is already in the frame, put it on your cardboard and cut one same sized piece. I’ve used red cardboard since my frame was white. You can use any color of frame and cardboard that you want.


Next, take some piece of newsletter that you don’t need, fold it on half and cut it in heart shape so you will get perfect shape of heart. Take that shape, put it on the cardboard that you’ve cut previously and put some marks on your cardboard so you will know how big your heart have to be.


For the next step you will need something like pen for quilling. I’ve used straw of the pen, cut it a little on the upper side so you can put your paper stripes, and start rolling them. For the one side, I’ve decided to use round shapes as you can see on the picture below.


Start gluing them with some regular paper glue and hold every piece a little until it is dry because it can loosen a little and they won’t look the same. Glue the pieces one next to each other on the one side of the heart you’ve already marked. I didn’t mentioned previously, I’ve used white stripes, but you can use any color of stripes that you want depending of the colors of your cardboard and frame.


To cut the stripes you can use scissors, scalpel or cut then on a shredder. For my stripes I’ve used the pasta machine and it worked perfectly. Now let’s continue with the other side of the heart. For the other side I’ve decided to make something differently. Take a few stripes and glue them one on another. In my case 4. Put all the ends that you’ve already glued into the quilling pen and start rolling. When you reach the end release the ends from the quilling pen. Start pulling all the ends a little and loosen them a little bit until you get the shape you can see on the picture below.


Glue all the ends together again and glue this piece on the other side of the heart.


Repeat the same procedure with gluing 4 stripes one onto the other using 4 stripes again. Turn this piece on the opposite side and start rolling each end inside. You have to get something similar like the shape on the picture below.


Glue this piece on the rest of the heart shape. Put your cardboard in the frame, but please make sure that first you are going to take out the glass of the frame. It this way you will get perfect 3D looking gift.


My name is Phoebe, and I reside in Santa Ana, California. Whenever I go through a day that’s been full of nothing but stress, I like to unwind by taking part in various types of crafting, which has always been one of my favorite hobbies. I also enjoy crafting as a way to simply pass the time whenever I don’t have anything else going on.