Menu
Romantic DIY Lanterns to Light Up Your Love
By Phoebe Nguyen | DIY

The modern lifestyle has made everything to be time-bound. You may want to surprise your loved one on the big day, but office commitment will usually be one factor to consider. It leaves you constrained and stressed since you have to opt for the typical chocolates and card for her or him. Shopping for the best gift becomes a nightmare rather than a pleasurable task. The pressure of finding the best gift and beating the deadline takes all the joy out of this experience.
Why should you not consider bypassing all the stress this time around and give your loved one a gift he or she will truly love and cherish? Something that is handmade. Yes, that’s right. It may take you some time and the best creativity, but the results will be surprising, trust us.
It’s an excellent DIY gift to rock his or her Valentine’s Day or birthday. For instance, your loved one will appreciate the effort you put into crafting it, which in turn will make your relationship stronger or make them thank you for your gesture. It’s a better option when you compare it to buying everyday gifts from departmental or online stores.
Romantic DIY Lantern to Light Up Your Love
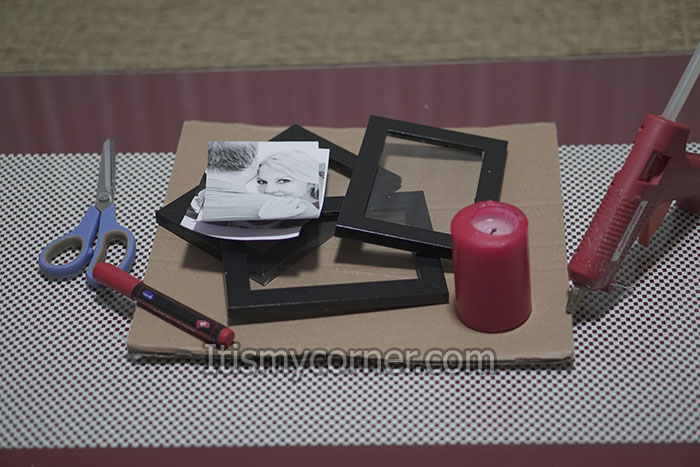
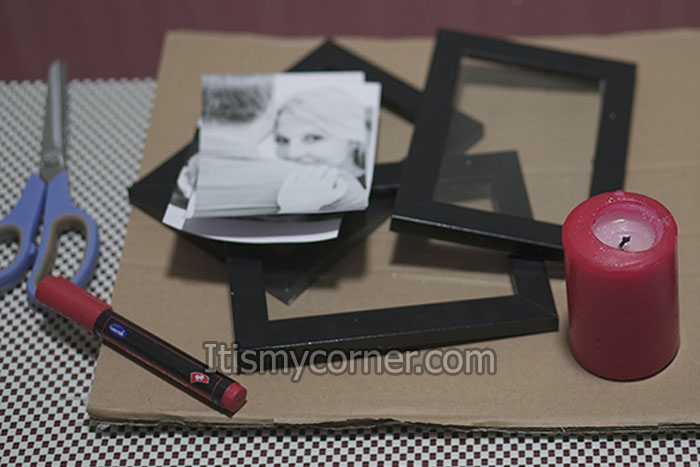
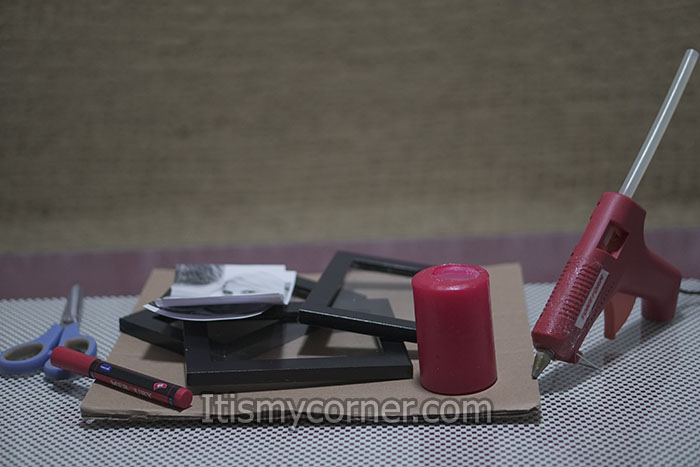
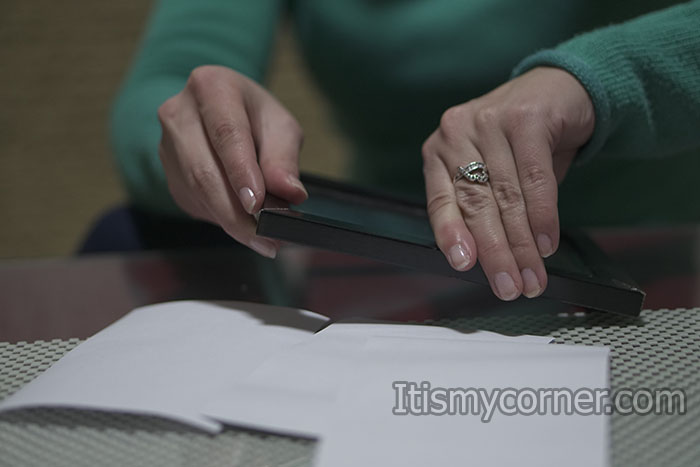
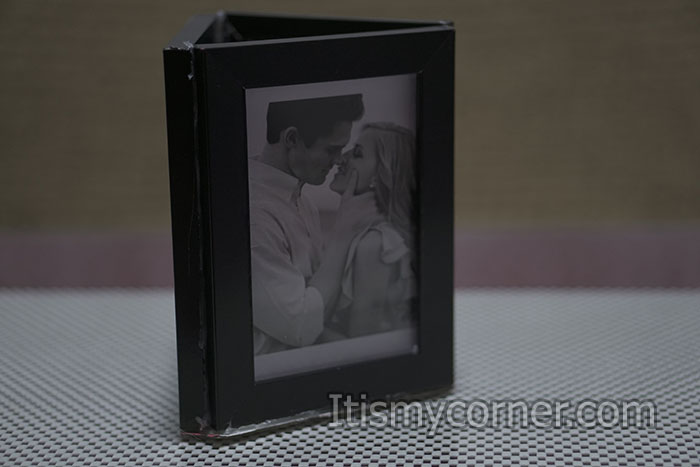
Take your frames and unassemble them. You won’t need the back part of the frames for this project, only the front. But, don’t throw the other parts, maybe you will need them for other projects.
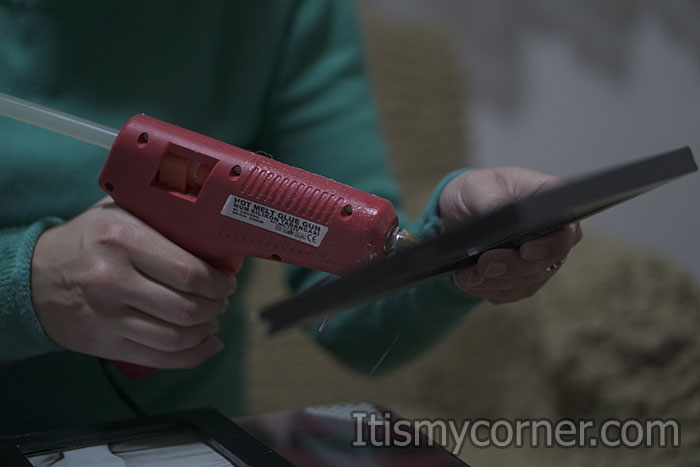
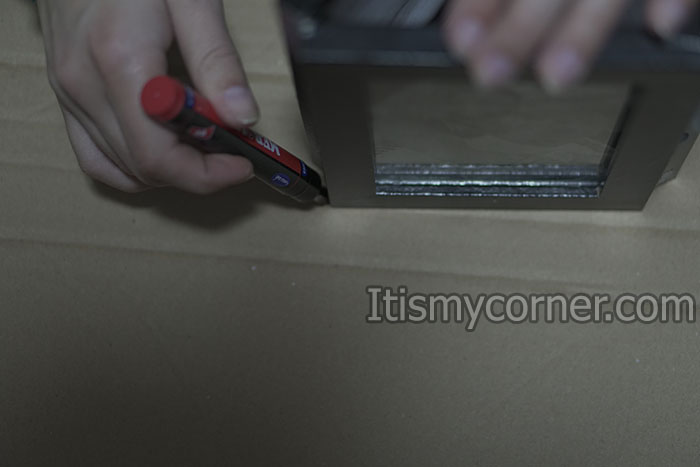
First, take the glass of the frames, also take the hot glue gun, put some glue on the corners of the frame and glue the glass so it don’t falls apart. Repeat the same procedure for all the frames.
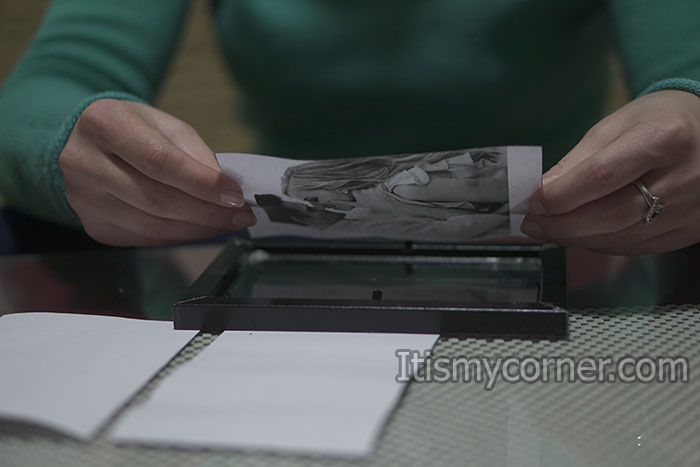
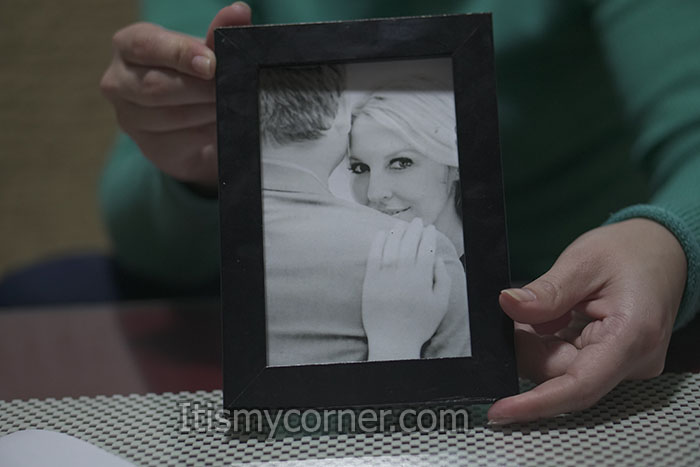
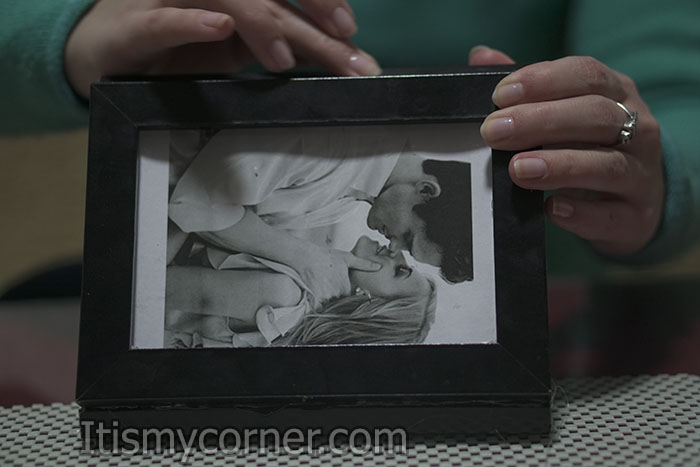
Take your pictures and put them in the frames. Before you print the pictures make sure they will fit in the frames you’ve already bought. So, first you want to measure the frames, and then print your pictures. For the best effect print the pictures on a regular paper, the thinner the paper the better the result. You want your pictures printed on thin paper because the light of the candle will glow more. You don’t want to print your pictures on cardboard because the light will stay in the lantern between the pictures. I’ve also decided to print my pictures in black and white version. You can also print your pictures in color, which is your choice.
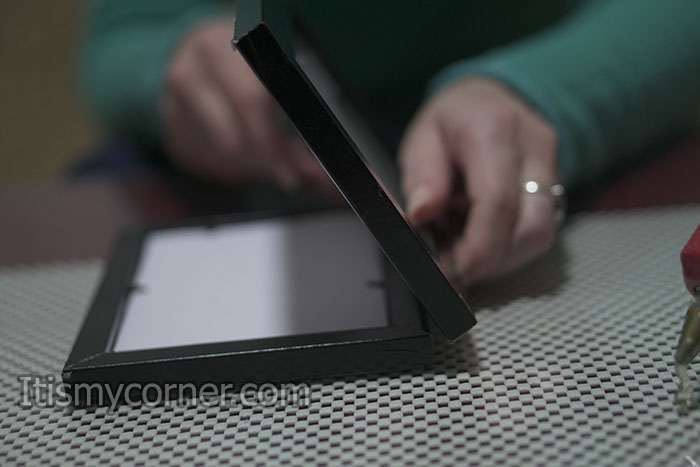
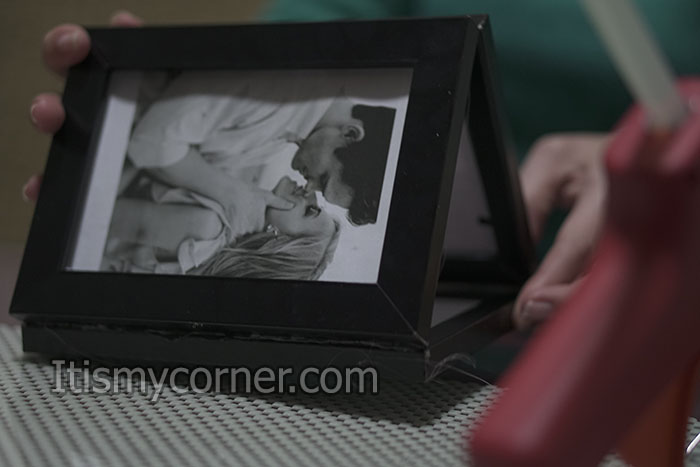
Next, take your hot glue gun and start assembling the frames together. First glue two of the frames on the larger side together, then glue the last one and you should get something like triangle shape.
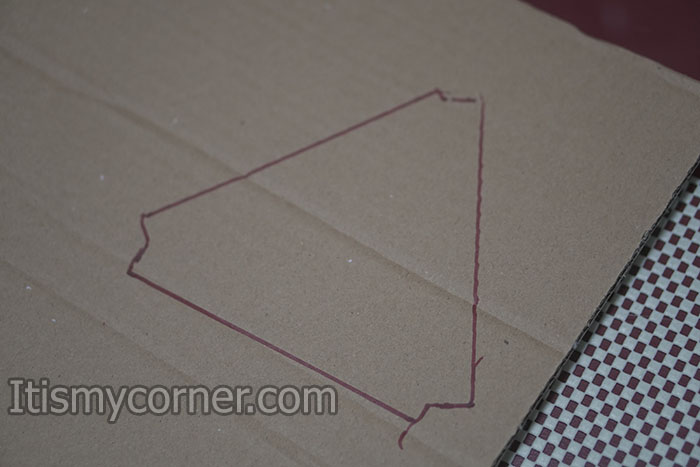
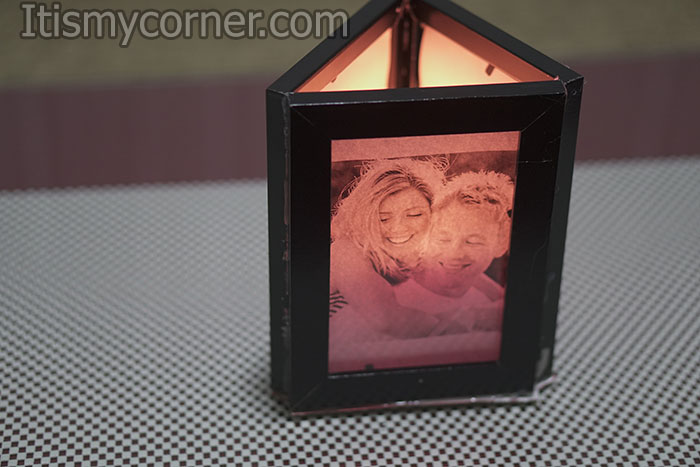
Take your marker, put the frames as they are on the cardboard, draw on the cardboard shape by the frames to make the bottom.
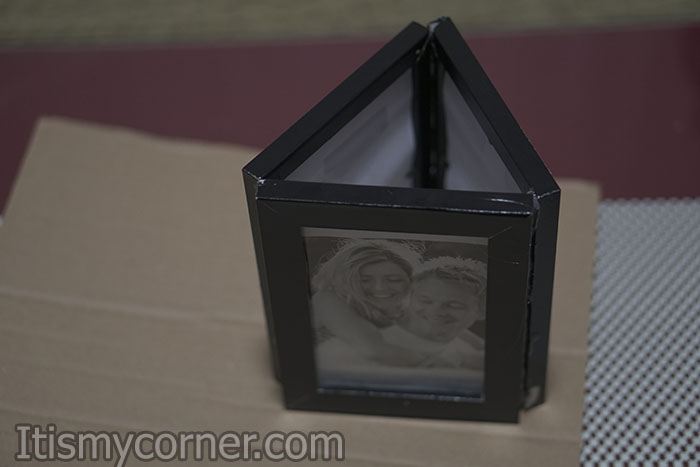
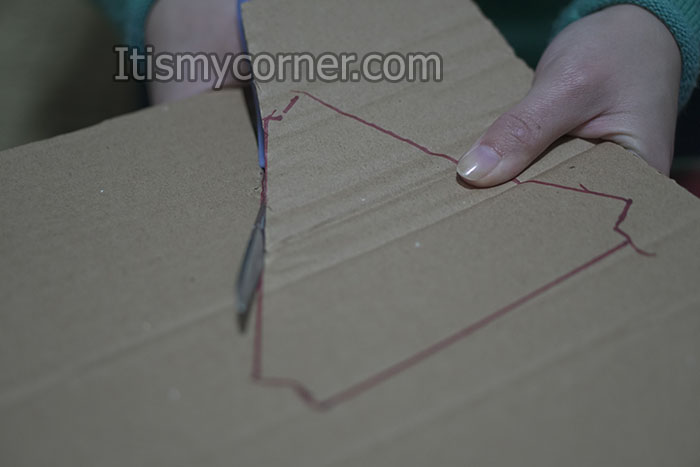
Then cut the shape using scissors.
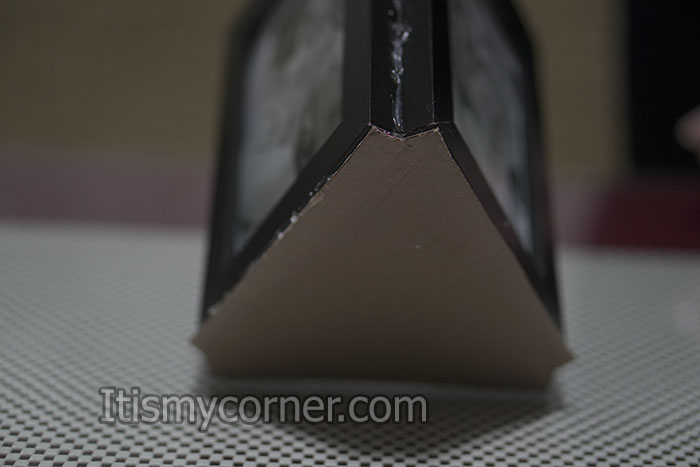
When you have the bottom of your lantern you can take the hot glue gun and glue the frames on the cardboard you’ve already cut.
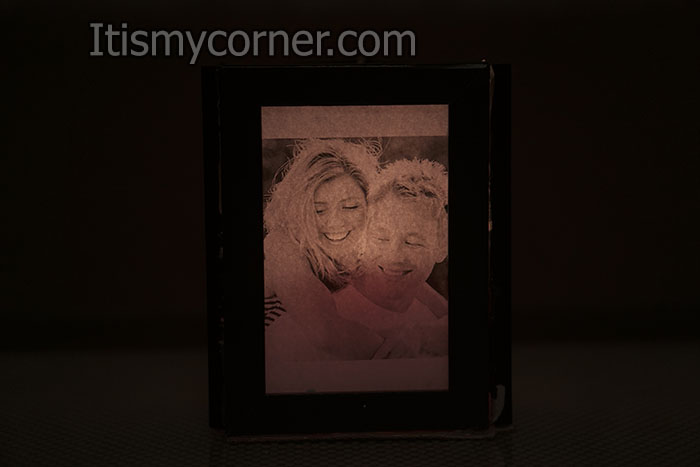
The last step is to put your candle in the lantern you’ve made and lit it. As you can see on my pictures I’ve used bigger candle, but I think that if you use smaller one the result will be better.

This is a perfect gift for birthday for your boyfriend. When you choose the pictures you will choose some that really mean to you two, like your first picture together, your first kiss etc. I’m crazy about creativity so I have a lot of additional ideas. So, you can also use some quotes instead of pictures, or two sides of the frame with pictures and one side with quotes (maybe “Happy Birthday”).
If you don’t have at least 3 frames at home with the same size and in same color, and you don’t have time to buy some, you can use a regular jar. You will approximately get the same effect. Take a regular jar, put your picture in the inside of the jar. Put your candle inside too and lit it. You can also add some bow on the top of the jar. Buy some beautiful chocolates or little cake, or you can also make your own cake with lots of love, throw some leafs of flowers around the lantern and celebrate the birthday of your boyfriend in a way that he will never forget.
Little additional advice. You can also glue the frames together on the shorter side. Also, you don’t have to use 3 frames, you can also use 4 and you will get another shape. Use your creativity.
My name is Phoebe, and I reside in Santa Ana, California. Whenever I go through a day that’s been full of nothing but stress, I like to unwind by taking part in various types of crafting, which has always been one of my favorite hobbies. I also enjoy crafting as a way to simply pass the time whenever I don’t have anything else going on.