Menu
An Easy & Inexpensive DIY Personalized Magnets
By Phoebe Nguyen | DIY

Shopping for a gift has proven to be easy, but there are some instances where you will find wrapping not working perfectly. For this reason, wrapping of gifts has become an outdated thing.
Unlike in the past where gift giving was tedious and expensive, you can make a gift that lasts longer and looks attractive by applying simple DIY clues. You just need to be creative and open-minded, and your relatives or friends will be amazed. Try doing it in your way and be sure it will be worth your time.
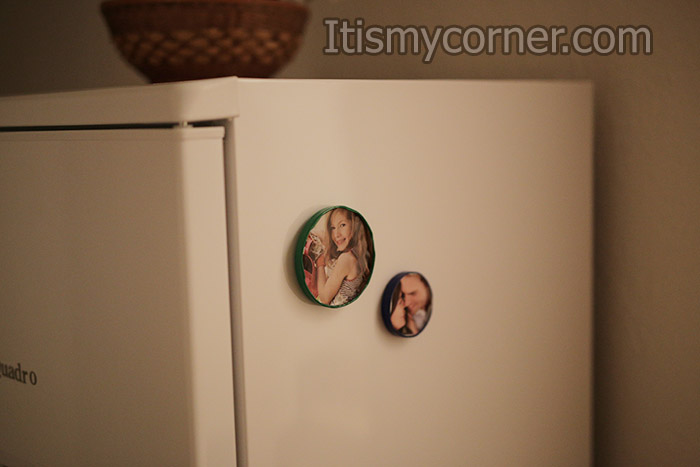
In most cases, finding the best gift for someone rich may prove difficult since it is hard to come across something that they will treasure for long. When facing such a case, you can purchase for them personalized magnets to use on their refrigerator since it will display essential photos of their past and also keep notes in place.
There are different designs and variety of magnets depending on individuality and preference. In case you want to know how to make a DIY personalized magnet, I will show you today how to do it.
DIY Personalized Magnets
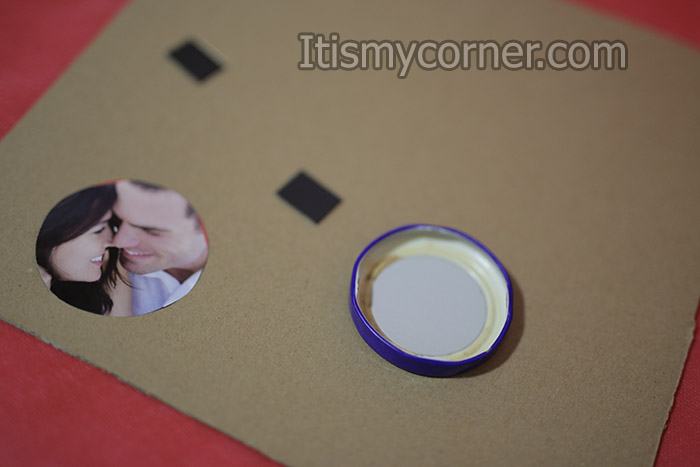
First thing you need to do before you start this DIY project is to pick your favorite picture and print it in a smaller format, depending of the lid jar you will be using.
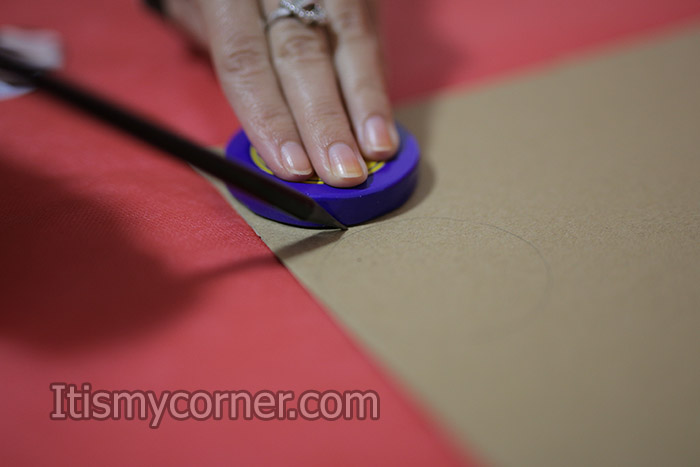
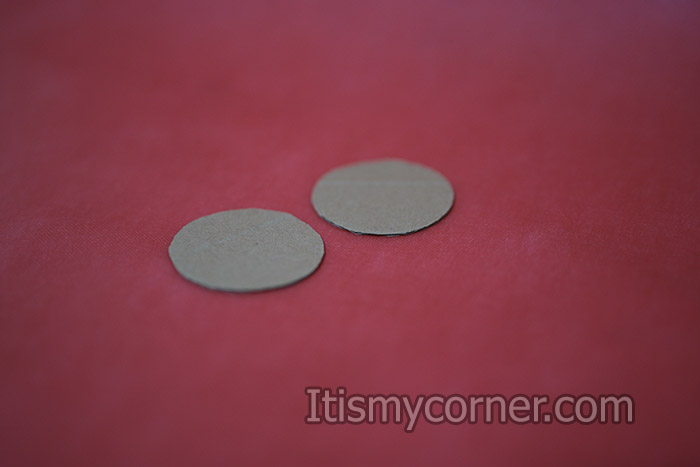
Next you can take your lid jar, measure the size of the lid and draw a circle on the card board. Also, you can make your life easier and draw the circle with the lid. The best cardboard you can use is as thick as you can find. I wasn’t able to find some thick card board so I’ve draw two circles on the same cardboard.
Then I cut them.
Now it’s time for some gluing. You can use any glue you like. I’m really happy with the way the hot glue gun works so I’m using it for everything including this project. Take the lid, put some glue inside and put the one circle of cardboard in the lid.
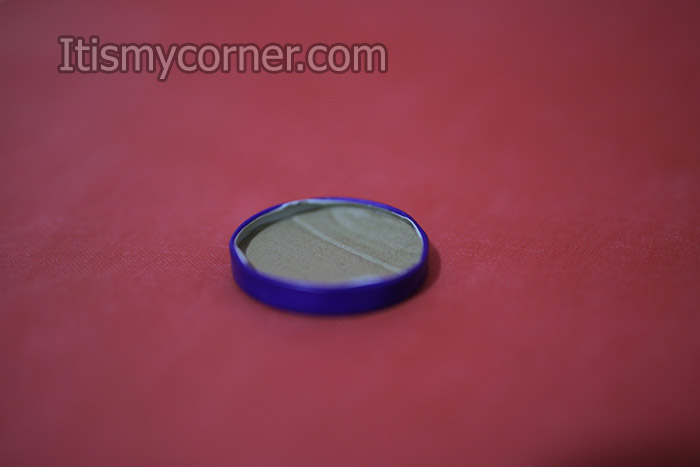
Next, take the other circle of cardboard and glue it on the previous one in the lid. You can put as many circles as you want inside the lid. The point is to fill the lid inside. I was happy how it came out with the two circles so I continued with the procedure.
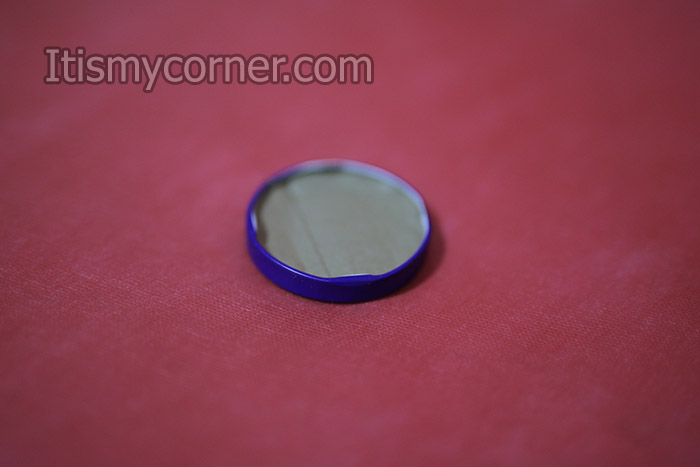
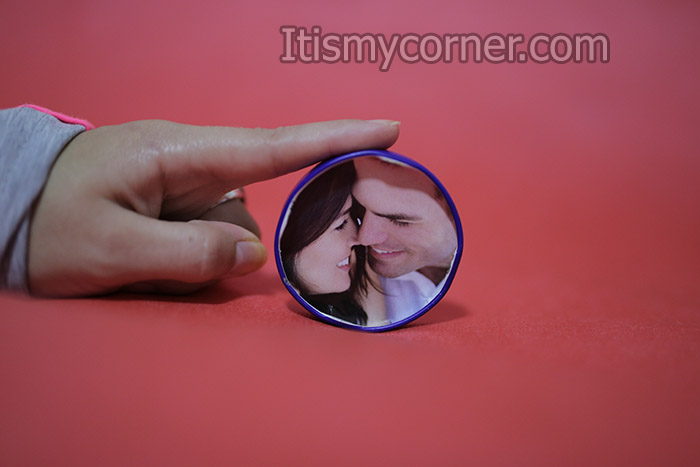
The next thing you are going to do is to take the picture you printed previously and draw a circle with the lid. Cut the circle of the picture and glue it on the top of the cardboard.
Next you have to do is to take the magnets. You can see if you need one magnet or two by putting the magnet on the lid and then the lid on the fridge. If the lid stays on the fridge, then one magnet is enough. If it falls of the fridge, then maybe you need to put two magnets. The magnets I used were sticky at the one side, so I stick the magnet on the lid. If you can’t find sticky magnet like mine, you can stick it with hot glue.

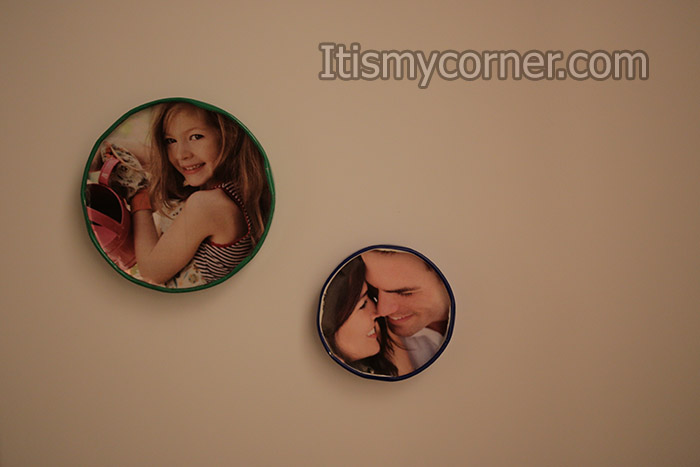
Here is the finished look.
Additional advices
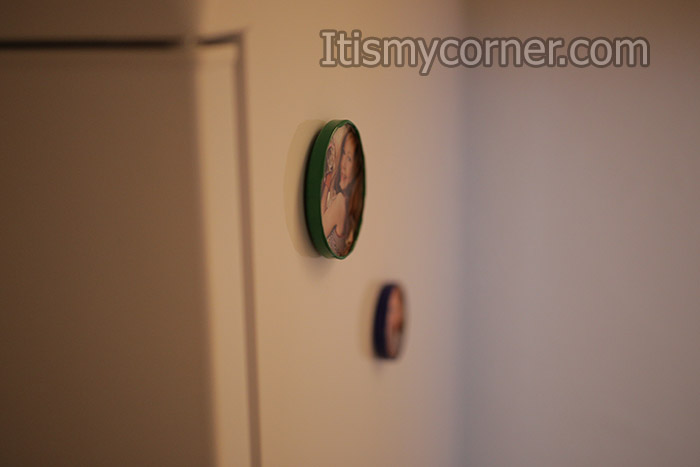
You can use different sizes and different shapes of jar lids and make a whole collage on your fridge with all the happy moments. You can also be creative and cover the lid with some sticky paper. Also, you can use some spray and make the lids in different colors. You can wrap a ribbon around the lid and make some bow at the top or at the bottom of the picture. Other thing you can try is to put pearls for gluing around the lid to give more shine to the magnet. I wanted the clean look so I left mine the way they are without adding anything.
This can be perfect gift for every occasion like Valentine, Christmas, birthday present only with adding picture of some crazy spent moments with your family, friends or loved ones.
My name is Phoebe, and I reside in Santa Ana, California. Whenever I go through a day that’s been full of nothing but stress, I like to unwind by taking part in various types of crafting, which has always been one of my favorite hobbies. I also enjoy crafting as a way to simply pass the time whenever I don’t have anything else going on.